5 Tips for Shooting Stop-Motion Videos
Stop-motion animation is an incredible way to bring inanimate, static objects to life. It requires a lot of patience, attention to detail, and a slightly different approach than regular photography.
If you are familiar with my work, you probably know that I love stop-motion videos and incorporating movement into my images. Making people wonder how I created a particular effect feels like creating magic, and that’s what I love most about this type of content. Besides, it’s almost therapeutic to create them.
Recently, I had the opportunity to create a stop-motion video for Superoot, a brand that offers an electrolyte drink mix designed to enhance energy, focus, and immunity made with natural ingredients like ginger, turmeric, maca, beet, and ginseng. The task was to create a short, catchy video showing these ingredients. While shooting, I thought it’d be great to share some behind-the-scenes secrets and tips on how I make these animations look so smooth.
So, here I am, ready to spill the beans on the top ten things I always keep in mind while creating stop-motion videos. Let’s dive in!
BTS timelapse
Tip #1: Use Continuous Lights
Lighting consistency is key in stop-motion to ensure smooth, flicker-free videos. Using continuous lighting instead of flash or natural light helps maintain the same light throughout the shoot. This eliminates flicker or light shifts that can affect the smoothness of the animation. Investing in good-quality continuous lights can significantly improve the overall look of the video by providing steady, flicker-free illumination.
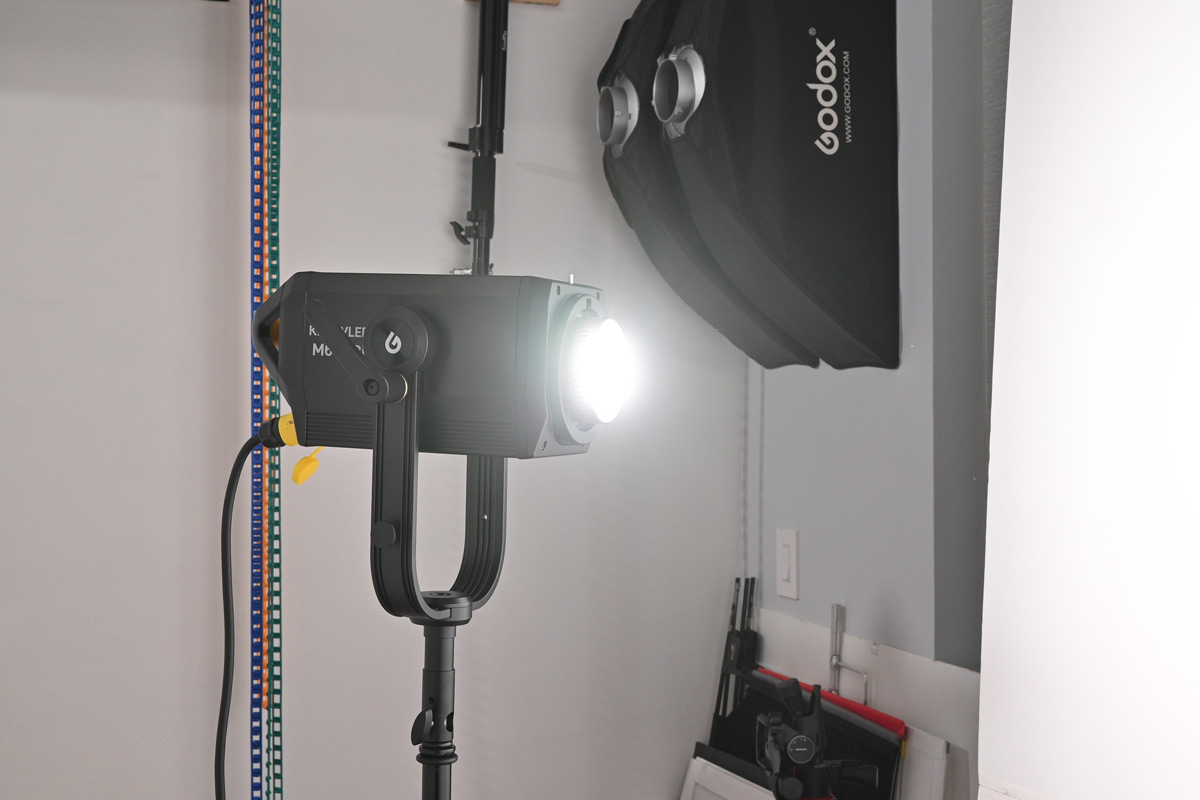
For this particular video, I used three continuous lights, including the Godox Knowled M600D, Amaran 300c, and Godox VL 300. These mono heads allowed me to fully control the lighting environment by canceling out all ambient light, ensuring that only the artificial lights influenced the animation.

Godox Knowled M600D
Tip #2: Use Dragonframe Stop-Motion Software
Dragonframe is the industry standard for stop-motion animation. It has features designed to make the process easier and more precise. It allows you to control your camera and view onion skin overlays to see the previous frame while setting up the next one. This level of control helps you avoid errors and maintain consistency in your animations, leading to smoother, more professional videos.
For quick and simple animations or GIFs, you can probably skip Dragonframe, but for anything more complex, it’s pretty much a must-have. Big studios use Dragonframe to create movies like “The Nightmare Before Christmas” and, more recently, “Pinocchio.” You can imagine how robust this software is! I mostly use it for the onion skin feature, which helps me align frames perfectly.
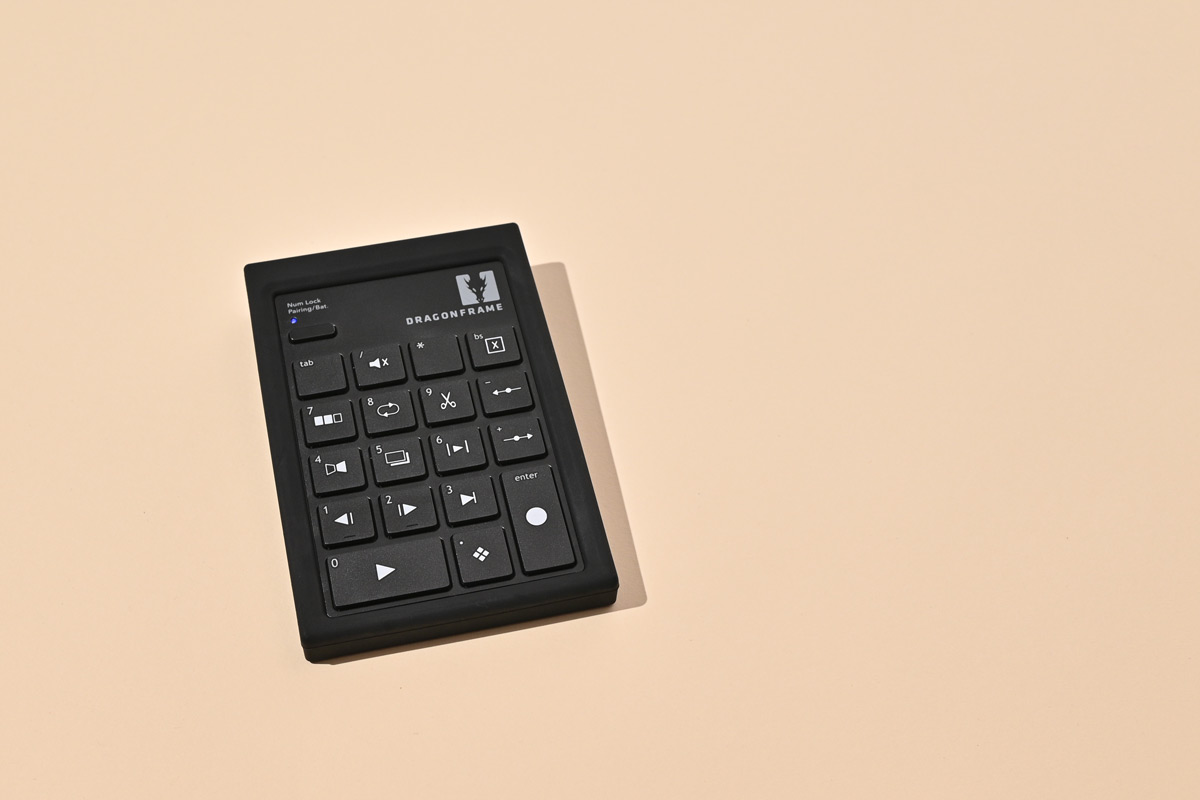
If you’re serious about diving into stop motion, I highly recommend getting the wireless keypad controller. It’s about $300 (including the license), but it’s worth the investment for the added ease it brings to the workflow. You can learn more about Dragonframe on their website.

Dragonframe wireless keypad controller
Tip #3: Use an AC Adapter to Power Your Camera
I should have started this post with this tip because I think it’s the most crucial for successful stop-motion: Never, and hear me when I say never, touch or move the camera while shooting a stop-motion video. This is the golden rule.
Stop-motion shoots can be lengthy (they are always lengthy, to be honest), and having to change camera batteries disrupts the workflow and leads to shifts in camera position. I learned this the hard way when I was shooting the last three frames of a video, and the battery died. I almost died that day, too! From that day on, I never rely on batteries when shooting stop-motions. Using an AC adapter to power your camera ensures a constant power supply, allowing you to focus on the animation without worrying about battery life. This small gadget can save time and help maintain consistency throughout the entire process.
I recommend this Nikon AC adapter if you shoot Nikon. I’ve used this generic one, which is way cheaper but probably won’t work with some camera models.

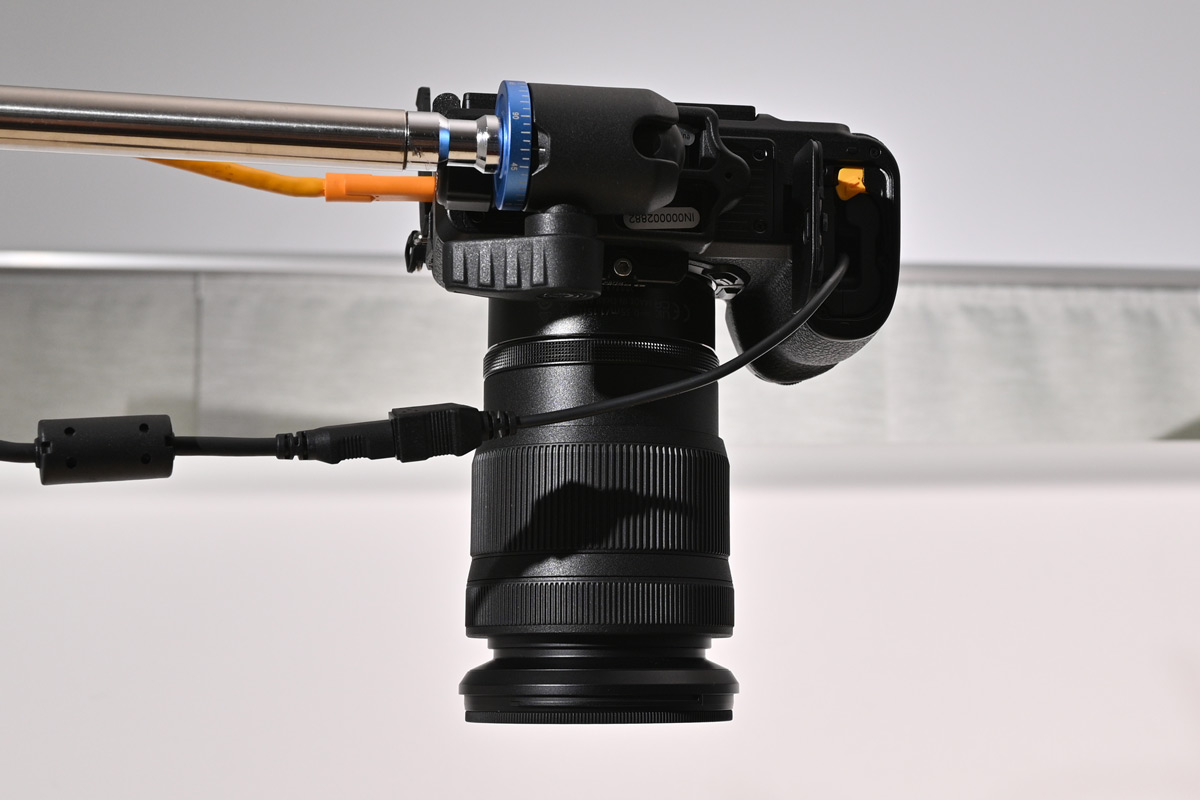
This was my camera setup for the stop-motion animation: The camera was plugged directly into the wall and connected to my laptop via a tether cable.
Tip #4: Use a Tripod
Using a tripod relates directly to our previous tip about consistency between shots. Just as an AC adapter is vital for maintaining power without interruptions, a sturdy tripod is essential for keeping your camera locked in place. Any movement, even slight, can affect the flow of the animation. A good tripod ensures that once you’ve set your camera’s position, it won’t move, which is crucial for getting flawless and seamless sequences.
I recommend any tripod from Manfrotto. The one I use is the Manfrotto 055.
Tip #5: Shoot from the Same Position
As you may have noticed, consistency is a theme in stop-motion animation. Just like maintaining consistent lighting is crucial, keeping your position consistent is equally important. Moving around the set and shooting each frame from a different position can change how light falls on the scene, leading to shifts in lighting that cause flickering in your final video. By staying in a fixed position, you minimize changes in light direction and intensity, helping to ensure that your stop-motion sequence remains flicker-free.
Additionally, wearing black minimizes light reflections or light bounce caused by clothing, which can also affect the lighting consistency. I personally always wear black when shooting photos or videos, and to ensure consistency in my position, I even mark the spot where I stand to ensure everything remains the same between frames.
Here’s the final stop-motion video I created for Superoot.
Stop-motion is truly a labor of love, demanding both patience and an extraordinary eye for detail. While the process might be complex and time-consuming, the results are always worth the effort.
The tips I’ve shared focus on what to keep in mind before and during the shoot, but we didn’t even talk about the animation process itself. You can imagine how creating a good stop-motion involves controlling various factors, adding to its complexity.
I understand that this might sound a bit overwhelming, especially if you’re a business or brand looking to leverage this type of content. But don’t worry, I’ve got you covered! You can count on me to handle every aspect of your next stop-motion project, ensuring your content makes people stop and stare.
For Brands and Businesses: If you’re interested in creating stop-motion content, please don’t hesitate to get in touch. I’m here to help you capture your audience’s attention in the most engaging and unique way possible.
For Fellow Photographers: If you have any questions about stop-motion feel free to reach out directly. I’m always happy to help.
Let’s create something amazing together—contact me today and let’s make your next project a reality!
Learn how to choose the right angles for your product photos to showcase your brand and attract more customers.
Create professional stop-motion videos with these 10 tips, perfect for photographer and brands looking to elevate their content.
Looking for a product photographer for your next photoshoot? Read on to learn 10 key questions to ask before hiring one to ensure a seamless experience and excellent results.
Have you ever wondered why professional photography is so expensive? Discover why professional product photography is a worthwhile investment. Learn about the costs and value it brings to your business.
Investing in professional product photography is essential for brands. High-quality photos should be integrated into digital marketing campaigns, content marketing, social media strategy, and more. Learn how to make the most of your investment with these 10 strategies.
Discover the impact of high-quality product photographs on your online business. Elevate your e-commerce brand with professional photography.
Learn four tips that will help you find the perfect product photographer for your brand. Define your needs, set a budget, review portfolios, and ask key questions.


